Product photography uses specific techniques to showcases products in an attractive way and entice potential buyers to purchase specific products.Product photography is an essential part of both online and offline advertising for successful catalogues, brochures, magazine ads, billboards, online ads and company websites, specifically when selling products direct to consumer.

The quality of a product photo reflects your brand image, creating the infamous first impression. The key to making the most of their first impress is to present polished, professional images that evokes maximum engagement.93% of consumers consider images essential in purchasing decisions.
Your images represent your product's perceived value and quality. They speak directly to your target audience, making your product page and content more relatable.
They offer amazing images of simple, everyday products, often making them cool and appealing.
Branding should be central to every decision your company makes, including:
And images are at the helm of your brand. They are the first to grab attention, instill trust, and invite customers to take a further look.
These should include your featured product, and a variety of images showcasing your product from different angles.
Throughout this guide, we're going to focus on two main types of product photography: product-only and in-context. These two subsections of product photography make up the vast majority of product images you see on websites and social media.
That show your product being used in its intended environment or alongside complementing products. Here's the same product in a lifestyle or in-context shot.
For those new to photography, your first product shoot may seem overwhelming. But after a few rounds, each step will become more natural, and you won't even have to think about it. The key is to find a process that suits your needs, optimize it, and create a set of guidelines to ensure you keep your images consistent.
Getting the right background is worth the effort, because it simplifies the entire editing process.
"Use a white or light backdrop, as it's easy to remove when retouching your images."
The simplest way to achieve this is by pushing a chair against a wall, and taping craft paper on the wall allowing it naturally fall to the ground, creating a seamless transition between the vertical to horizontal plane. Or you can clip the paper to the top of the chair to improvise a stand for your sweep like the image above.
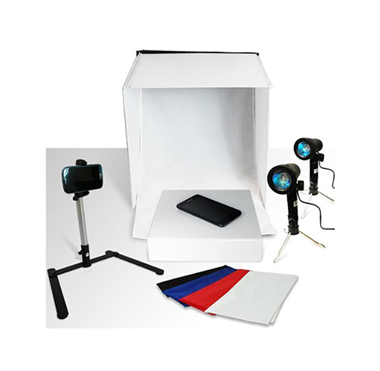
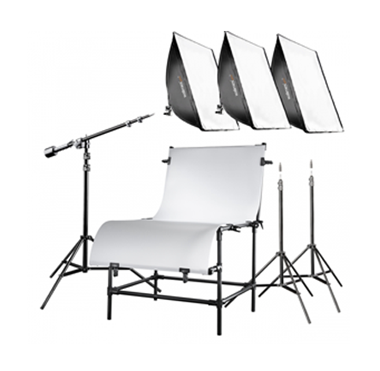
A light tent is a box-shaped device with translucent walls, designed to help distribute the light evenly around the object of photography.
Here's how to set one up

If there is one deciding factor that defines the quality of your images, it's light.
Lighting can be very tedious to set up, but when done right, it brings beautiful results and significantly simplifies your post-processing.
Start by placing your shooting table near a large window, ideally one that allows lots of light into the room.
If the shadows are too harsh, use white plasterboard or cardboard on either side of the object, helping to reflect some light and soften it. It's always best to shoot when the day is at its brightest, giving you more light to play with.
Better to have too much sunlight and minimise it, than not enough.It's very hard to create great lighting during the editing process.But keep in mind never to shoot under direct sunlight. Just like a strong backlight, direct light can create harsh shadows.
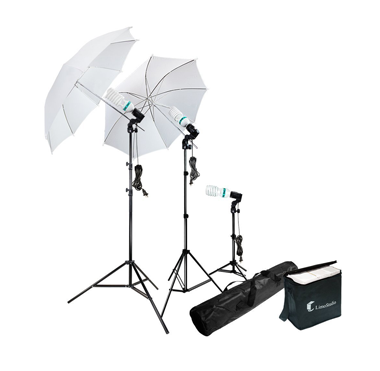
One of the lights should serve as your key light, and the other as your fill light or backlight, depending on your desired results.
Consider placing some white paper or cloth over them to diffuse some of the light, helping to achieve softer shadows.
Manipulate the angles and distance of the lights until you get soft, evenly distributed shadows.
You can also use white plasterboard or cardboard to defuse some of the light and further soften those shadows.
This is what lightboxes are designed to do; they are a diffuser of sorts, distributing the light evenly around the product.
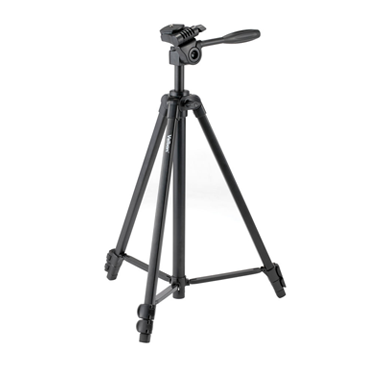
Tripods bring consistency, stability, and focus. It is easy to end up with blurry images when you try to get your entire product in focus, while holding your camera in your hand without moving.
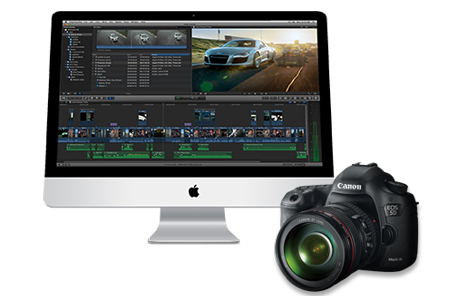
If you're using a camera, set it to a low aperture (AKA a high f/stop), and slow shutter speed.
That way you will get a wide depth of field, keeping your entire product in focus, leaving your products looking crisp.
It's vital to stabilize your camera when you are shooting with a wide depth of field in order to avoid blurry images.
Their long focal length magnifies any vibration caused by the camera shutter and mirror, wind, or by the photographer themselves. ... When using a shutter speed slower than this simple rule of thumb suggests, a tripod is in order. A good tripod will help steady your camera and ensure sharp pictures.
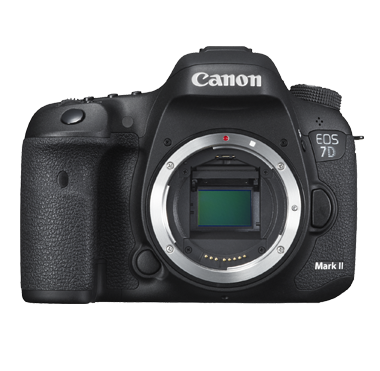
However, if you have a smartphone, you don't need to worry about investing in a camera when you're getting starting.
Smartphone camera technology has come a long way and sometimes you can take even better pictures than you might using a professional camera.
So as long as you get your lighting and background right, your iPhone or Samsung device can do a good job.
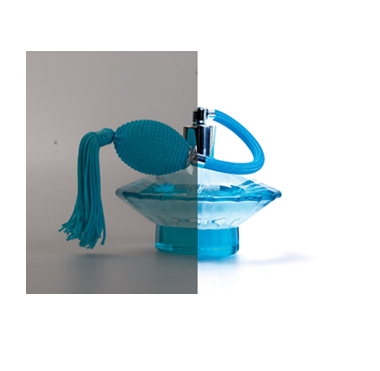
Even if you shoot your product with a smartphone, editing can be the difference between mediocre and professional results.
For those starting out, getting the background or the lighting right takes a bit of trial and error. Thankfully photo editing can make a multitude of flaws magically disappear. Retouching covers anything from background removal to color correction, mannequin removal, and shadow addition for a more natural look.
Photo editing is a time-consuming process, especially until you get the hang of things.